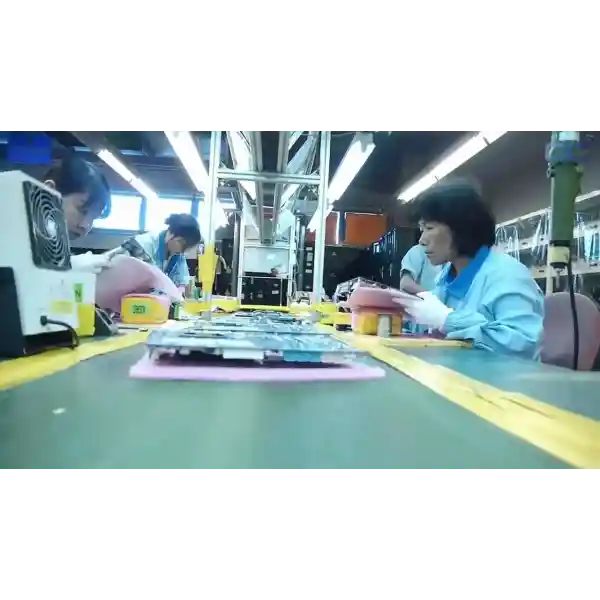
چگونه یک مادربرد بسازیم - فیلم تور کارخانه گیگابایت

چگونه یک مادربرد بسازیم - فیلم تور کارخانه گیگابایت

OverClocking-TV

۲۴ تیر ۱۳۸۹، ۲۱:۵۵
watch in youtube
توضیحات نظرات
The motherboard in this video are part of the Ultra Durable series. Our current Z170 recommended motherboard from this series is the Z170 UD5 : http://amzn.to/2dlrqAJ Check out our remastered version with a native english speaker : http://www.youtube.com/watch?v=5vWrEmpRX_Q [EN] Xyala and Trouffman explain how to make a motherboard from A to Z. This video shows exclusive footage on the production line of the GIGABYTE Factory in Nan-Ping, Taiwan. The process is similar for all manufacturers, but GIGABYTE is the only motherboard maker who still manufactures in Taiwan. [FR] Xyala et Trouffman vous expliquerons comment fabriquer une carte mère de A à Z, la video montre des videos exclusives de la ligne de production de l'usine GIGABYTE à Nan-Ping. Le procédé est similaire pour tout les constructeurs. Flattr This : https://flattr.com/thing/269802/How-to-make-a-Motherboard-A-GIGABYTE-Factory-Tour-Video More than 200K views : here are some pictures from the tour and the back story about this video : http://www.overclocking-tv.com/content/news/14816/how-to-make-a-motherboard-video-hits-200000-views/ --------- Music by Silence Song : an extract of the track called "Effacé" Name of the album : L'autre endroit. Download the complete song and Album for free from here : http://www.jamendo.com/en/album/830 Music by DJ Fire-Black Song : Nightfire (Psychotropic Edit) Part 2 / Part 3 / Part 4 Album : Psychotropic Download the complete song and Album for free from here : http://www.jamendo.com/en/album/68833 Thanks to DJ Fire-Black for the songs rights ;) Tag : hwbot --------- Movie realized and produced by OverClocking-TV.com. © Overclocking-TV.com 2008-2010 Today we are at the GIGABYTE Factory in Nan-Ping, Taiwan to show from beginning to end, exactly how a GIGABYTE motherboard is made. A motherboard uses a lot of components, all of them are assembled on a PCB PCB means Printed Circuit Board creating the motherboard you will recognise from inside your PC. The PCB arrives from another factory and the first process is to solder on the board all the SMDs SMD means Surface mounted devices. SMD is a term use for all the components that don't have pins going to the other side of the PCB but have their electrical connections on the edges. like the resistors, bios, audio and sata chips, as well as the chipset itself. Every part of the PCB that will be in electrical contact with a component gets coated with a special soldering paste.  The solder paste acts like glue for all these chips before going into the reflow oven for definitive soldering. In that way every small component is in the right position before soldering. As you can see, the solder paste is applied on the PCB space only in places where you will have components. All motherboards today have dozens of very small and thin SMD components that are directly placed on the board. The high speed Chip Placer can place from 5 to 10 components per second. It's incredibly fast. Most of the components mounted by these machines are around a millimeter wide and must be very precisely placed on the PCB. Today's motherboards have components on both sides, the first side that goes into the factory process is the reverse side. Once the reverse is done, a machine switches the motherboard to the front side and the process starts again on the SMT Line. After the small components, it's time to mount the chipset CPU socket and all the other chips that will made your motherboard work. Before being placed on the motherboard, each chip is first verified by different sets of lights to check if there is any problem with the soldering points or alignment of the chip. You can see that chips like the chipset, audio, SATA and USB ICs are placed on the board by this machine The same goes for the CPU Socket. For example, all chips that are bigger than your finger are placed by this machine. Now that your motherboard has SMDs on the board, it is ready to go to the Reflow Oven for the soldering process. The soldering paste is melted at very high temperatures, sticking the components to the PCB. Temperatures reach as high as 245°C as the motherboard moves through the different levels. At this point electrical and mechanical connections are made. Now that your motherboard has all the small resistors as well as the major chips and the CPU socket it's time for the visual inspection. This inspection ensures there are no misplacements or missing parts. Components smaller than 2 millimeters cannot be checked by visual inspection, but this is why we have the AOI machine. The Automated Optical Inspection machine checks if there are any missing or misplaced components. It also checks all the components that have visible soldering point, like the audio chip. And finally the ICT, or Integrated Chip Tester stage, can verify that every chip that has soldering point below, like the chipset, is well connected. It tests if the chip is well-soldered electrically to the board, but does not test if the chipset itself is working. This factory floor is dedicated to additional verification, especially for server components. Some boards are tested by X-Ray to verify the quality of soldering. This inspection is a high quality service that allows very high-end and server board to be checked in more depth. And server board to be checked in more depth. Once these last tests are made after the SMT stage, it's time to go to the DIP or Dual Inline Package stage. The DIP stage is the second major process when making a motherboard. First you have manual insertion; with all the small components and ICs has been already added it's time to place all the other components that have pins going through the PCB. During this stage all the components are manually inserted. You can see a long chain of employees inserting the I/O connectors power sockets, PCI-Express and ram slots also the chokes and solid capacitors around the CPU Socket. Before being finally soldered on to the PCB each inserted part needs to be in the right place and well positioned this is the goal of the inspection before the wave soldering. The principle of the wave soldering is simple the motherboard has components on one side, with pins going through the PCB The Wave Solder touches the back of the PCB and these pins are soldered to attach the components to the board. After the Wave Soldering process you usually have residues that are cleaned with a large brush making the back of your motherboard shiny. Another inspection is made, with manual touching-up with a soldering iron if needed. Then heat-sinks are mounted on the board before another inspection and check-up by the ICT or Integrated Chip Tester. Your board is now fully functional, but the biggest quality control still needs to be done. Employees are testing everything. From component connectivity, to the all important burn-in test. The Function Box allows easy "Switch ON / Switch Off" of the components as well as peripherals for testing purposes. As a part of GIGABYTE's rigorous quality testing procedure, 100% of the boards' components are tested with basic to advanced functionality fully verified. Once the board has passed all the testing and quality Analysis, the boards are sent to the next process: The packing. This is the final step for your motherboard where it makes its way into the box you'll see in the shop. At the factory the boxes are just flat cardboard The packaging starts off as flat packed cardboard boxes that are quickly fashioned into retail boxes by an automatic machine. Employees apply barcodes and references numbers on the boxes, as well as on the board, then scan the different serial numbers. Your board is almost ready. The bundled accessories that include the manual and drivers DVDs are added, Each motherboard box goes into larger boxes ready for shipping (These are then weighed and strapped up before being send to distributers and retailers). This ends our video detailing how GIGABYTE Motherboards are made. We hope you enjoyed this OverClocking-TV video and look forward seeing you again soon.
تمامی حقوق محقوظ است. ساخته شده با Elham ExA2040